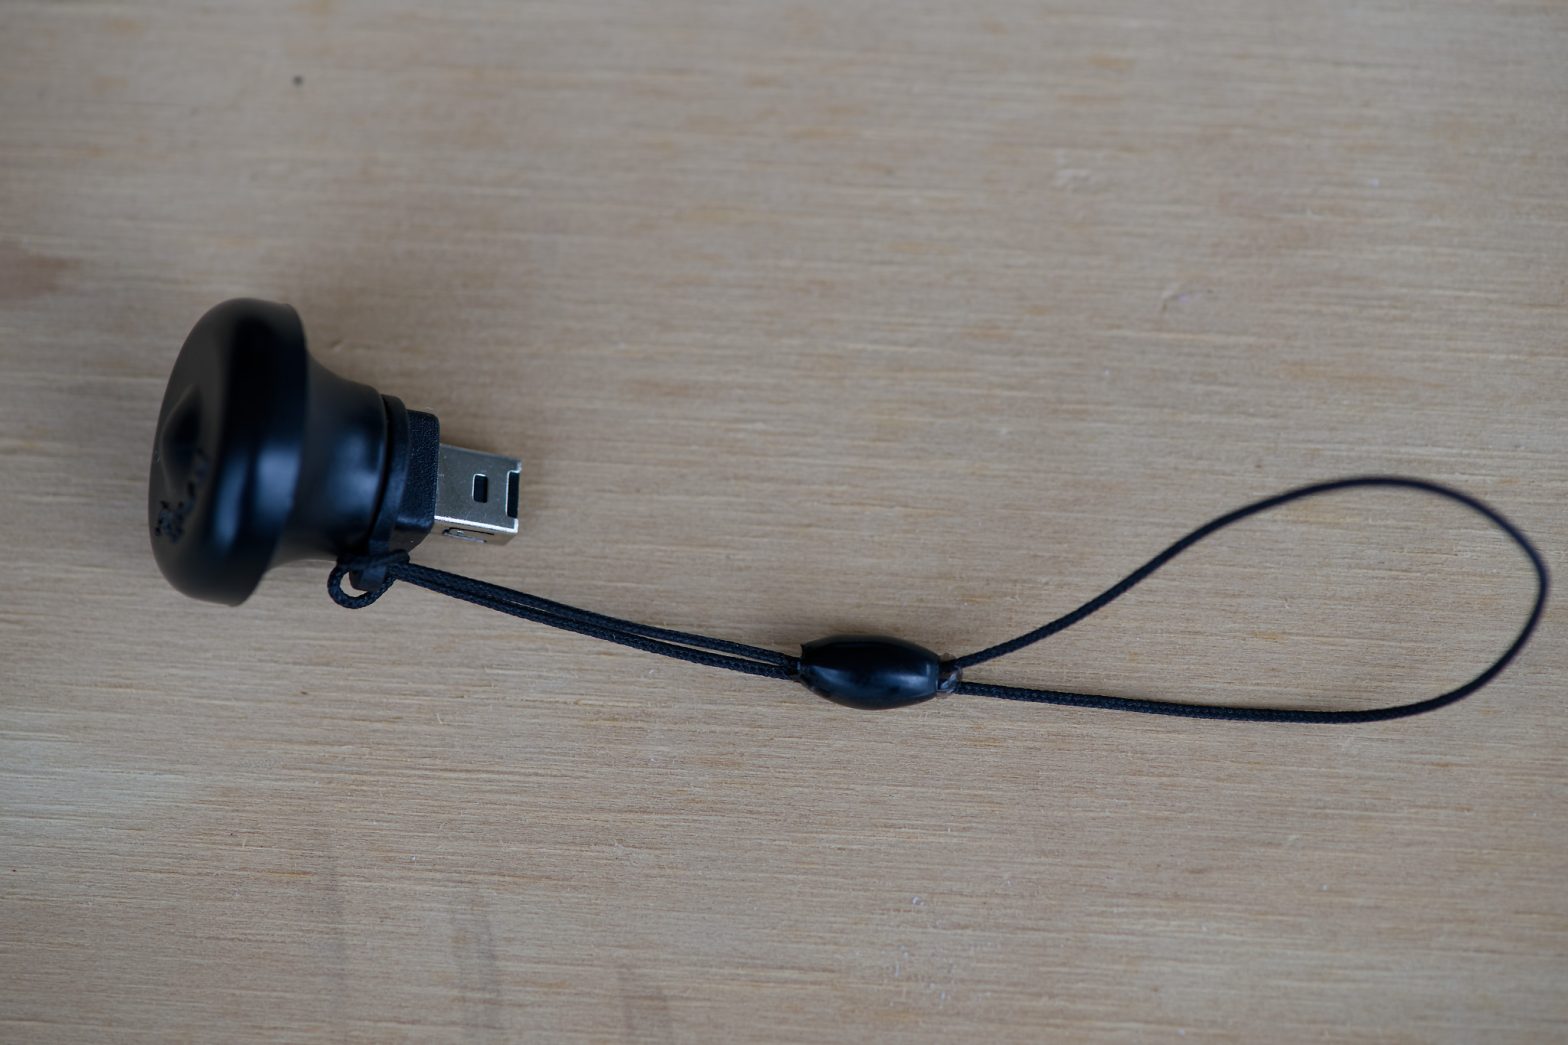
I was given two of these Prazi GPS Units with Shutter Release, Remote Control functionality for use on Nikon cameras for testing, evaluation and usage purposes. There are two seperate units. The first unit, the S Adapter, intended for use with Nikon cameras with the rectangular 10-pin connector ( Nikon Z5, Z6 series, Z7 series… Continue reading Prazi GPS Logging Unit With Shutter Release Remote Control for Nikon Cameras
Category: Camera Settings For Better Images
Over 50 of the Best Tips To Help You Improve your Photography
There are many ways to improve your photography and the subject ranges from understanding the technical jargon of photography to the way you compose the image and also to the aspect of having your camera with you when a photographic opportunity arises. Tip 1 – Have your camera with you at all times. I love… Continue reading Over 50 of the Best Tips To Help You Improve your Photography
Improving Your Photography By Getting Sharper Images From Your Camera
There are many ways you can improve your photography. One of the main aspects is to improve the sharpness of your images that you capture. If we look at all the issues and there are many which can contribute to movement of the image captured by the camera sensor; it is the camera sensor which… Continue reading Improving Your Photography By Getting Sharper Images From Your Camera
A Detailed Guide To Understanding The Settings And Menus On Your Digital Camera
Every Digital camera has a Menu designed to help you set the camera to enable you to get the best image results from the camera. The settings for focus, shutter speed, aperture and ISO are not the only settings on your camera, there are many other settings available. In this blog I will attempt to… Continue reading A Detailed Guide To Understanding The Settings And Menus On Your Digital Camera
Some Photography Tips for Better Images
There are many tips to help you get nicer images from your camera. With today’s cameras, generally the camera is very good in getting the exposure correct, but there are a few settings, where the camera can be overridden to change and improve the “look” of the resulting image.
Review of Nikon Live View Shooting Mode
What is Live View Shooting Mode The Live View Shooting Mode with Nikon cameras is exactly what it says, you actually see on the LCD display, what the lens is seeing, but what you are seeing on the display is actually a fraction of a second after the camera has captured the scene due to… Continue reading Review of Nikon Live View Shooting Mode
Best Nikon Camera and Lens Options For Wildlife Photography
When photographing wildlife, there are several main criteria that you should aim for with your equipment and we will summarise some of those in this article. The above image of the kangaroo has been captured with a Nikon 300mm f/4 lens, on a Nikon D700 camera. Cameras There are a few important specifications to… Continue reading Best Nikon Camera and Lens Options For Wildlife Photography
A Review of Nikon Camera Light Metering Systems
When using a camera’s light metering system it requires some knowledge of what settings to use to get the best exposure for your image. With the Nikon cameras there are essentially three different metering settings to understand when measuring the light levels. Spot metering, centre weighted spot metering and matrix metering, some knowledge of… Continue reading A Review of Nikon Camera Light Metering Systems
Taking Advantage Of Your Cameras ISO Settings With Nikon Cameras
There are many advantages of the latest breed of cameras, with their high ISO settings. The ISO setting effectively is the sensitivity of the cameras sensor to the light. Many of today’s cameras will give options for ISO settings of ISO6400 and higher. There are many advantages in being able the set your camera… Continue reading Taking Advantage Of Your Cameras ISO Settings With Nikon Cameras
Analyzing Your Lens Focal Length, Aperture, Shutter Speed and ISO Usage
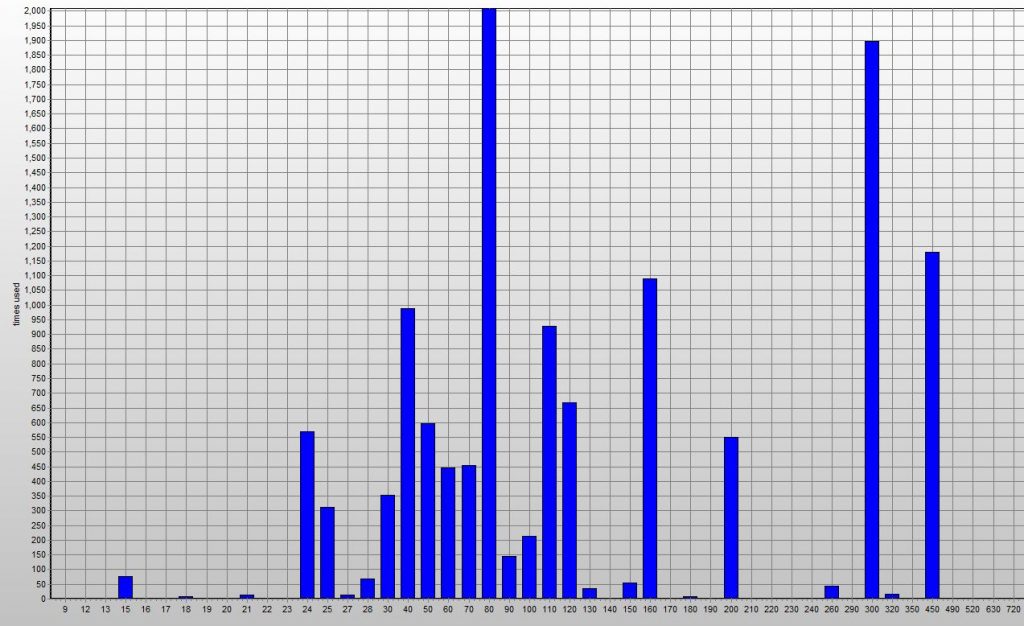
There is a great free program to analyse your usage of your lens focal lengths, aperture, camera shutter speed and ISO settings. The program is Exposure plot and can be downloaded free. The above graph is an analysis of my Focal Length usage over the last few years. The program automatically corrects for the 1.5… Continue reading Analyzing Your Lens Focal Length, Aperture, Shutter Speed and ISO Usage
Camera Guide and Settings For Better Images
The following articles are general camera guides to the settings of your camera for better images. Beginners Guide – Top Ten Tips to Improve Your Photography Capturing Stunning Images Getting The Image Right In The Camera Camera Vibrations and Image Sharpness Slow Shutter Speed Raw Image Files and Processing Isolating the Subject Moving Images High Shutter… Continue reading Camera Guide and Settings For Better Images
The Histogram
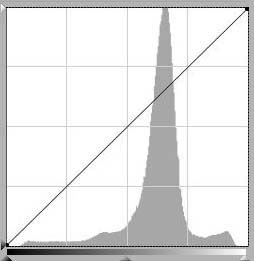
The histogram on your camera is the most important camera control or tool to ensure that you capture a full range of tones in the image. When you look at the histogram it essentially represents the number of stops of exposure which the camera is capturing.
Beginners Guide – Top Ten Tips to Improve Your Photography
There are many things you can do to improve your photography. In the following article we will sumarise the tem main thing you can implement to make your images stand out.
Water Movement Photography
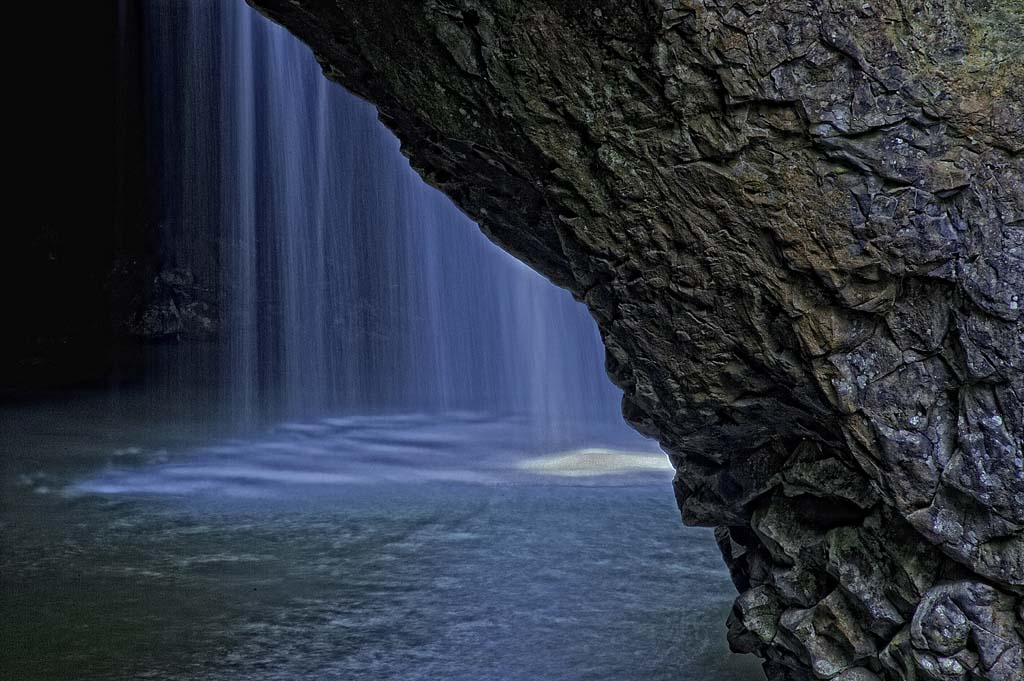
The movement of water can help to create interesting images. In order to capture images such as these it is essential to use a tripod, as shutter speeds close to 1 second or greater will be required. Generally a shutter speed of 1/8 of a second will start to blur the moving water, but with a tripod any shutter speeds up to 1/2 minute can be tried.
Getting The Image Right In The Camera
Photoshop is a great software package, but the secret to obtaining stunning images is to get everything right in the camera and after you have achieved that, then work on the image in Photoshop. Most of the work in getting a good image happens before the Photoshop stage. We have other articles on Workflow after… Continue reading Getting The Image Right In The Camera
Camera Vibrations and Image Sharpness
Modern Digital Single Lens Reflex (DSLR) cameras have mechanical components for both the shutter and the mirror mechanism. These mechanical components can have a significent effect on the sharpness of any image due to the vibrations within the camera causing the camera to move. The mirror slap vibrations in particular will cause a degradation in… Continue reading Camera Vibrations and Image Sharpness
Slow Shutter Speed
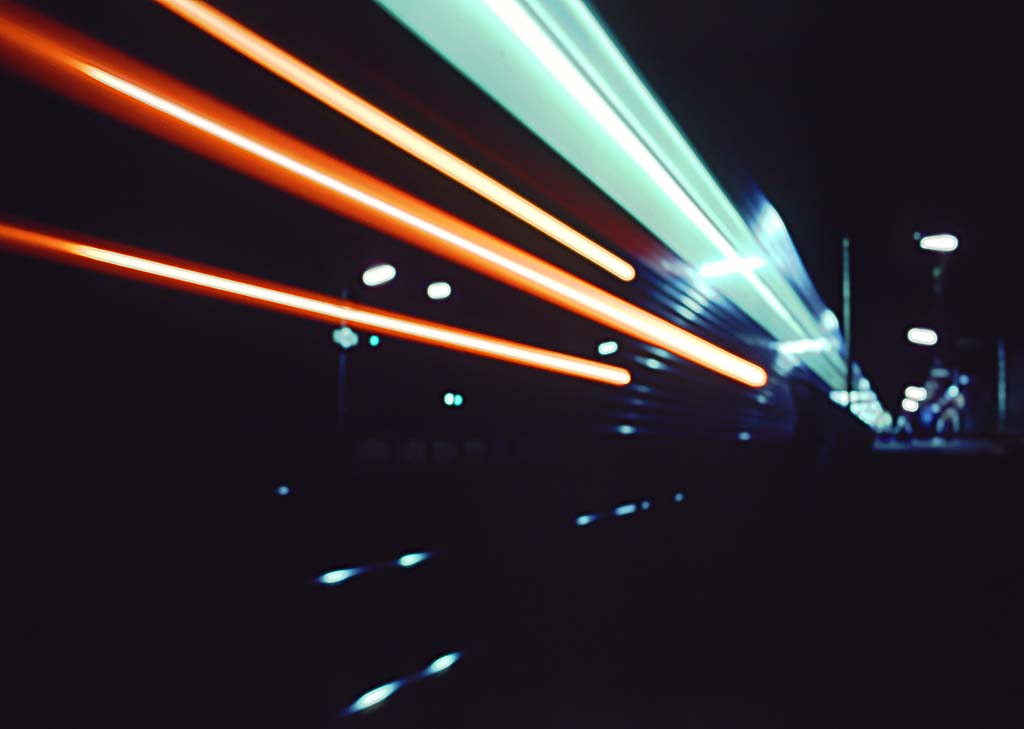
Slow shutter speeds can be used when you wish to gain a sense if movement or blurring of the image. In the image of the train above, the shutter speed was several seconds long, allowing the lights of the train to move across the image. It is very advisable when using slow shutter speeds to… Continue reading Slow Shutter Speed
Raw Image Files and Processing
In general most Digital Single Lens Reflex (DSLR) cameras offer several options to record the image files. In general these formats are TIFF, JPG or RAW files.
Moving Images
A slow shutter speeds can be used when you wish to gain a sense if movement or blurring of the image. In the image of the amusement park below, the shutter speed was several seconds long, allowing the lights of the wheel to move around the image.
High Shutter Speeds
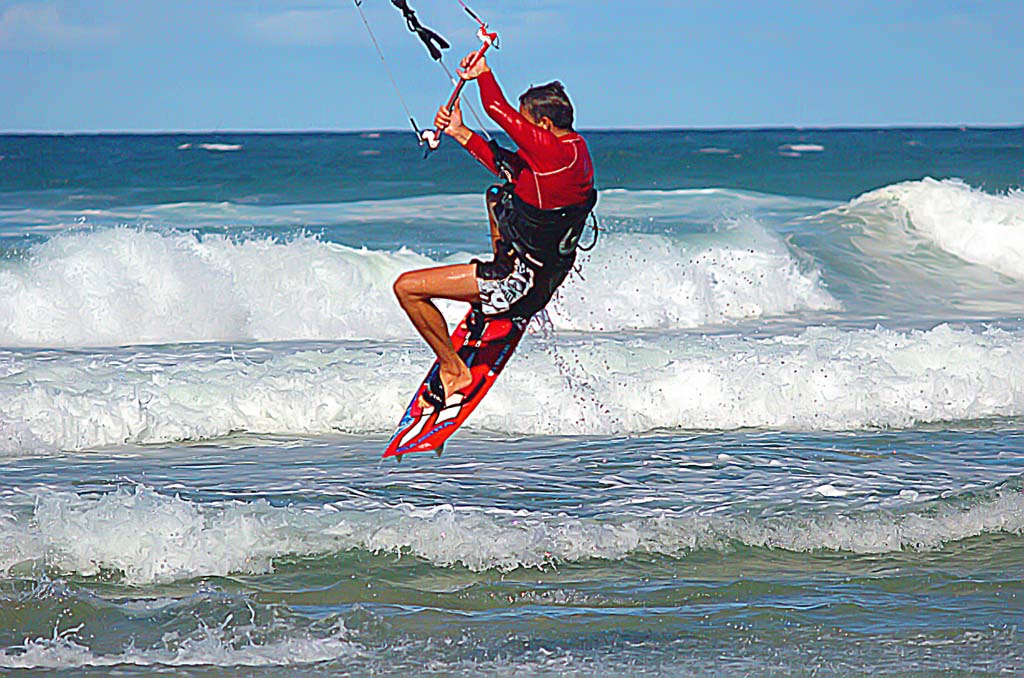
Any image of a moving subject will require a high shutter speed to avoid blurring of the subject. The kite surfer above was moving very fast and required good long lens technique and a very high shutter speed to avoid movement of the subject.