There are many ways to improve your photography and the subject ranges from understanding the technical jargon of photography to the way you compose the image and also to the aspect of having your camera with you when a photographic opportunity arises.
Tip 1 – Have your camera with you at all times. I love photographing birds and one of the best bird images I have captured was a very beautiful White-bellied Sea Eagle flying overhead. At the time I was photographing honeyeaters in our backyard and the eagle flew overhead, it was a coincidence that I had my camera in my hands with the long 200-500mm zoom lens on at the time and was able to zoom in to capture the bird. If I did not have the camera at hand there would have been no image. It does pay to have a camera close at hand most of the time to catch the unexpected image.
Tip 2 – Read your camera manual and understand the main aspects of your cameras menus. Understanding the settings and capability of your camera will help you get the best from your camera. I stress again read the cameras manual. Here is A Detailed Guide To Understanding The Settings And Menus On Your Digital Camera.
Tip 3 – Learn the inter-relationship between shutter speed, aperture and ISO. The lens aperture determines how much light gets to the imaging sensor, the shutter speed is how long the shutter is open for and ISO is the sensitivity of the imaging sensor.
Tip 4 – Become totally committed to your subject. If you specialise in a particular style or category of photography, then study that particular subject matter thoroughly, become an expert and be passionate on your subject and be totally committed. People who are obsessed and totally committed to a subject are generally very successful with it and understand it fully.
Tip 5 – Spend some of your hard earned money on learning instead of on photographic gear. Learning can be done by reading books, the internet or by attending workshops or camera clubs.
Tip 6 – Stop shaking. If your camera moves your images will not be sharp and will not look good. Use a tripod or monopod to steady your camera. Do not use a cheap light tripod, a tripod needs to be solid and steady.
Tip 7 – Learn post processing. Post processing is very useful with digital photography. With post processing you can sharpen images, change the contrast, change brightness, change saturation plus a multitude of other adjustments. It should be noted that some of the camera manufacturers offer free software post processing packages as part of their camera offers.
Tip 8 – Get a specialist lens. Study nature with a specialist macro lens. Get a specialist portrait lens, a 105mm low aperture lens would be good. Get a long telephoto lens for bird or animal photography.
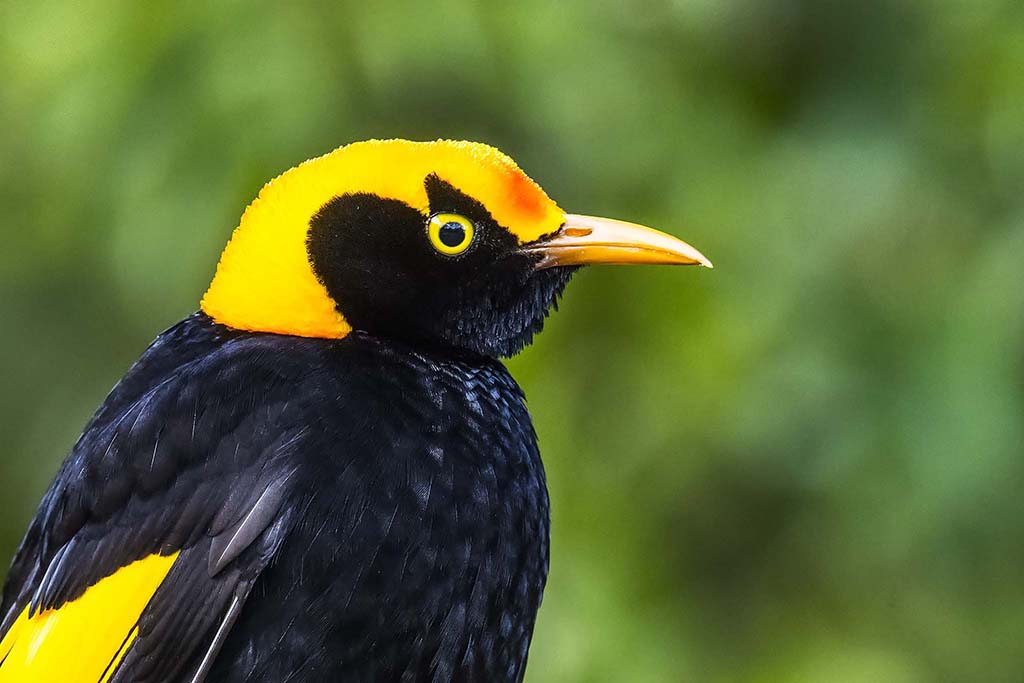
Tip 9 – Focus on your subjects eyes. It is always so important to get the eyes in focus.
Tip 10 – Get the exposure correct. It is all about the shutter speed, aperture and ISO.
Tip 11 – Learn about the camera’s histogram. Do not cut off the darks and do not cut of the whites. Ensure that you get the full dynamic range of your camera’s sensor.
Tip 12 – Get the focus correct. Ensure that the lens is focused on the subject.
Tip 13 – Use a lens hood. A lens hood will protect the front of the lens against knocks and its main reason for use is to prevent stray light from reflecting on the front of the lens causing undesirable flare.
Tip 14 – Photograph the “golden hour”. The golden hour is generally referred to as the time around sunrise and the time around sunset when the shadows are longer and the lighting is more diffused. Since the light is more diffused, the photographer is less likely to ‘blow out’ highlights or lose detail in the shadows.
Tip 15 – Beware of atmospheric haze. When using super long lenses, 300mm or longer, on a hot, humid day, haze in the air can cause loss of sharpness and fogginess when shooting with long telephoto lenses over a long distance.
Tip 16 – The Golden Section. Golden colours are always bright and noticeable but the Golden Section is even better. The ratio of the Golden Section can be used for the following applications:
- To give pleasant image proportions in accordance with the aspect ratio,
- To determine the position of the horizon,
- To give a composition with pleasant proportions,
- To locate the center of interest of the picture.
Tip 17 – A blaze of colour with flower power. Adding colour to your images will always add a great amount if interest, colourful flowers and flower bed can look wonderful in colour images.
Tip 18 – Compressing the scene. Compressing the scene can make a plain scene look more interesting and more dramatic. Use a telephoto lens to compress the scene.
Tip 19 – Diagonal lines. Diagonal lines are often useful if objects are included on the diagonal lines it can give the image a sensation of sliding and moving. The diagonal line can be a most dynamic type of composition.
Tip 20 – Simplicity. Take images of simple objects. This can be very effective wit nature photography by getting in very close to the subject.

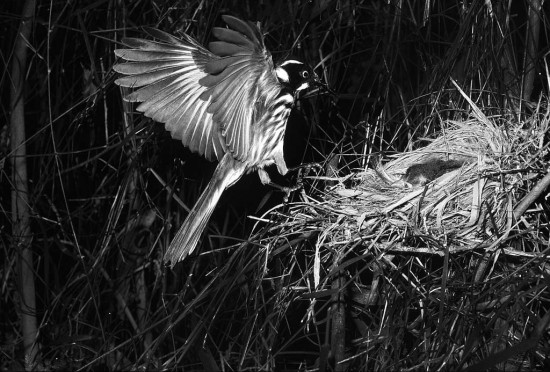
Tip 21 – Monochrome images can be effective. Try something different like the monochrome image of this yellow honeyeater.
Tip 22 – Shopping centers. When you go shopping take your camera, sometimes there are great opportunities.

Tip 23 – Leading lines are great to lead your eyes into the image. Lines in a photograph that are positioned to draw the viewer’s eye towards a specific point of interest. These lines will draw the viewer’s eye in a specific point in the image.
Tip 24 – The rule of thirds. The photogaphic rule of thirds describes a basic compositional principal where you split the image into 9 segments by using 3 vertical and 3 horizontal lines. Generally the rule is that you place key elements of your scene at one of these areas in a photo. This can apply to points of interest in the scene or any lines such as the horizon or any other lines in the image.
Tip 25 – Look for plain uncluttered backgrounds. I photograph lots of birds and I always try to avoid strong patterns or clutter behind the subject. A single sharply focused subject against a plain background will stand out and make a more dynamic image. Sometime if you capture your image from a low angle the sky will make a good plain background.
Tip 26 – Change Your Viewpoint when capturing the image. Get down low to exaggerate the perspective as objects get smaller as they move into the distance, this will give the image a better sense of depth. By capturing more of the ground, you can add perspective to your image. Changing the viewpoint also has the added benefits of providing more foreground interest and will significantly improve the composition.
Tip 27 – Frame Your Scene. Using natural objects try to create a natural frame around the subject in your photograph. This principal will enhance the scene by creating depth and guiding the viewer through the scene. Use objects in the scene to create a natural frame which leads the eye to the main subject.
Tip 28 – Night time city lights. City lights at night are always a great time to get beautiful colours.
Tip 29 – A wet and misty day. Do not put your camera away on a wet and misty day. Get into action. You will get images with atmosphere.

Tip 30 – Add bright colours. Bright colour in you image will always make your images stand out and will make them the center of attention.

Tip 31 – Cropping an image. Cropping can add interest to an image by bringing attention to a certain subject.
Tip 32 – Patterns in nature. There are many patterns appearing in nature which can be captured to give more options to make you images more dramatic.
Tip 33 – Include patterns in your composition. Patterns in your compositions will add interest and give more impact to your images.
Tip 34 – Hold the camera level. Keep the horizon straight and level.
Tip 35 – Learn to use the exposure compensation setting. This setting can compensate for front or back lighting in your image. Using the “+” button will add light to the image making it lighter and the “-” button will reduce the light making the image darker.
Tip 36 – Use a wider aperture for portraits or similar subjects where you want to make the subject pop. Withe a wide aperture f/1.4 to f/2.8 the subject will stand out against the out of focus foreground and background.
Tip 37 – Match the shutter speed to the lens focal length. A general formula for this, is for the shutter speed to be 1/F seconds, where F is the lens focal length. For a 200mm lens the shutter speed should be a minimum of 1/200 seconds.
Tip 38 – If you make a mistake and get a bad image. Learn from it.
Tip 39 – Dust is your enemy. Keep your photographic gear clean, especially the lens glass elements and the camera’s imaging sensor.
Tip 40 – Make use of leading lines. Try to capture leading lines that lead to the center of interest in the image.
Tip 41 – Take spectacular images that you would put on your wall. Take images that you would love to have permanently on your wall at home.
Tip 42 – Capture the critical moment. Capture your subject in time at the peak of the action.
Tip 43 – Zoom with your feet. You may not need a zoom lens if you zoom with your feet. Move closer or move further away to get a different view.
Tip 44 – Join a photo web site such as Flickr. On a web site you will see other peoples images to get new ideas and others cam comment on your images to help you improve your photography.
Tip 45 – Do not compare your photographs to others try to be different. Be yourself. Be original.
Tip 46 – Try to capture the emotions of people rather than just their faces. Peoples emotions can be great to capture and offer more than just a straight portrait. Add interest to your photos.
Tip 47 – Join a camera club. Camera clubs can give you a completely new opportunity to learn about photography, to meet other photographers and to show off your work to get constructive criticism.
Tip 48 – Do some close up macro photography. Get a macro lens or or a supplementary add on close up lens. Macro photography can give a completely new meaning to you photography as you can see objects as you were never aware of them and you see a completely new perspective.
Tip 49 – Use a reflector to reflect light on to the subject. This idea can be very useful for portraits to add fill in light to a models face.
Tip 50 – Under poor lighting conditions use a flash. Poor lighting can destroy an image so consider the use of supplementary lighting such as a flash unit. Balance the flash lighting with daylight or consider the use of a reflector in conjunction with the flash.
Tip 51 – Humor in photography. There is always room for humor in our lives as well as in our photography.
Tip 52 – Star Scenes. Capturing Star Scenes and Capturing Milky Way Images can give wonderful images so just try it.
Summary
I hope some of the above tips can give a few ideas as to getting an improvement and variety in your images