This is a continuation of seven articles on Photoshop CS4, Adobe Camera Raw.
White Balance, Targeted Adjustment, Crop, Straighten, Spot and Red Eye Removal
Adjustment Brush, Graduated Filter, Preferences The Histogram, Basic Adjustments
Curves, Sharpening, Noise Reduction Grayscale, Black And White, Split Toning
Lens Corrections, Camera Calibration Examples Of Usage
Tone Curve Tab
The Tone Curve can give a large amount of tonal variation in the image to obtain a satisfying image.
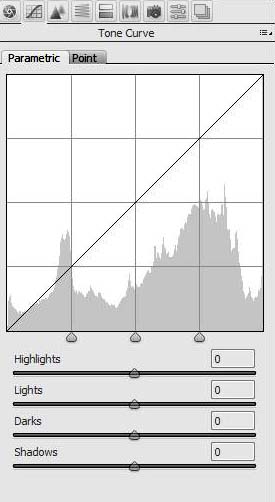
Parametric Curve
The Parametric Curve Tab has four sliders below it to adjust the shape of the curve. The adjustments available are as follows.
- Highlights – Adjusts the highlights
- Lights – Adjusts the lighter tones
- Darks – Adjusts the dark tones
- Shadows – Adjusts the darker shadows

The parametris sliders have their limitations in the ranges provided and where this is the case, the adjustments below can be implemented using the point curve.
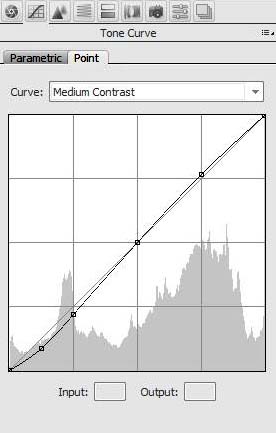
Point Curve
The point curve can simply be adjusted by clicking on the curve and moving it. It is far more flexible and provides a wider range of adjustment than the Parametric Curve.

Detail Tab
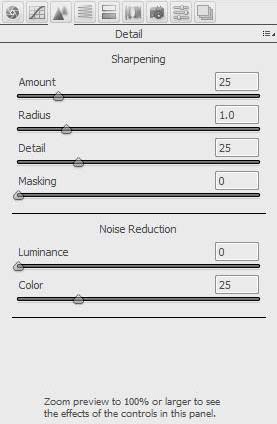
Sharpening
Sharpening, sometimes called unsharp Masking, is a process where the edges of the image are searched for and the light side of the edges are lightened and the dark side of the edges are darkened. When sharpening it is best to view the image at 100%.
- Amount – The Amount slider determines how much of the Unsharp Masking is applied to the image.
- Radius – The radius slider determines how far each side of the contrasting edges the sharpening will be applied. This is measured in pixels width.
- Detail – The Detail slider when set to low levels emphases the sharpening on blured edges, when set to higher levels it emphasises the sharpening on textures.
- Masking – The Masking slider restricts the sharpening to the strongest edges and will not sharpen on blured areas or skys where there is little contrast.

Noise Reduction
The noise reduction reduces the grainy pattern in images. Noise reduction is generally only required at higher ISO settings. Again when applying noise reduction the image should be viewed at 100%. Too much noise reduction can degrade the image.
- Luminance – Applies noise reduction to the luminance content of the image.
- Color – Applies noise reduction to the color content of the image.
This article is continued in seven parts as follows.
White Balance, Targeted Adjustment, Crop, Straighten, Spot and Red Eye Removal
Adjustment Brush, Graduated Filter, Preferences The Histogram, Basic Adjustments
Curves, Sharpening, Noise Reduction Grayscale, Black And White, Split Toning
Lens Corrections, Camera Calibration Examples Of Usage
