Archive for the ‘Photography Workflow’ Category

Image Theft On The Internet

Eastern Dwarf Tree Frog (Litoria fallax)

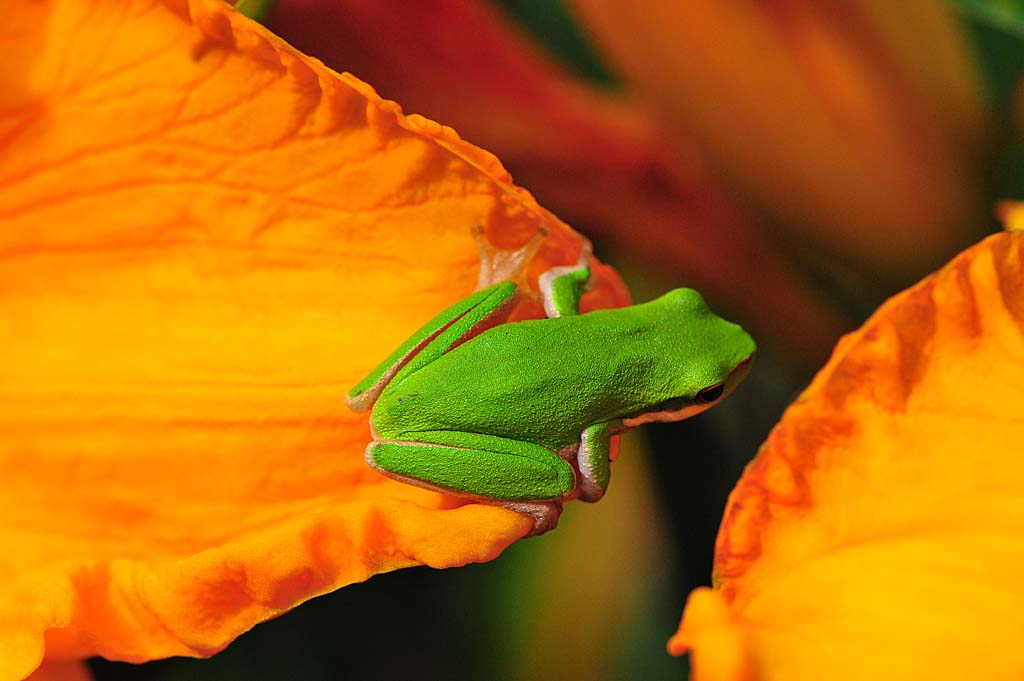
The above image is one of my images that I really have much affinity for.

I captured this image with my D700 camera and 105mm Micro lens at a local park and I find the colours very appealing.

There is much we can do to avoid or make it harder for the thief to steal your images. We can use watermarks, but I do not like these as in my opinion it defaces the image. I like the images I display to be the highest quality for the viewing public.

What if our images do get stolen, should we be proud that someone likes our images enough to steal them or do we get upset , who likes thieves anyway. I certainly do not.

 Google Is My Friend

There is an easy way now to find out where your images are on the internet. It is a Google facility called Image Search. I find it extremely accurate to identify where your images are. You simply need to go into Google http://images.google.com/, drag and drop your image into the dialog box.

Google

Once you have dropped the image, then Google will search for all like images on the internet. Surprise, surprise, from the list that shows up by the Google search there are several sites with like images to mine which I have never been involved in.

I can not understand why a professional person or company would just copy images from another site, not only is it theft, but for a company trying to look professional and original, it makes them look like a company that is lacking in respect for other peoples work, does not have any of their own expertise and has no originality. Would you deal with a company with that sort of reputation?

Name and Shame The Thief

I would not like to accuse anyone of stealing my images but the following are several sites where I found very, very similar images, you can be the judge.

Both these sites are Web design businesses and they state on their site that they employ a photographer for original graphic work in their business.

I find it absolutely amazing that their photographer has captured an image identical to mine !!

I have shown some screen captures from the two of these sites below. The two sites seem to be related in some way.

Koost Web Design

http://www.koostwebdesign.com


Pashley Web Design

http://pashleywebdesign.co.uk

I have Emailed these sites to find out what is going on and have also mentioned them on Twitter to bring it to their attention.

Postscript

I have had an Email from the Web sites concerned and they said that they thought the images were open source images. Perhaps they needed to do a bit more research before posting them.

This company said they would remove the images in five days and they have not done this.

I have sent Koost Web Design, several Emails, advising them of the image theft, also I have sent them another Email with an invoice for usage of the image and they have accused me of spamming. They do not seem to want to talk to me. I wonder why.

 Update - What Can I Do About My Stolen Image?

Well there is something you can do. You can issue a DMCA complaint to the Company who is hosting the Web site where your stolen image resides. The technicalities of a DMCA complaint is outlined in Wikipedia – Digital Millenium Copyright Act.

It should be noted that this is based on US law and applies to Web pages hosted in the United States, I am not sure where you stand if it is hosted in other countries.

In the complaint you will need to specify details of the complaint as follows:

  •  The offending Web domain address.
  • The IP address of the offending Web site.
  • The offending Web page where your image is hosted.
  • Outline specific details of the copyright breach and give a link to your Web site where your image belongs.
  • It is a very good idea to keep copies of your Raw images as well as the .JPG images, as the Raw image is like a film negative and can be proof that you are the original copyright owner and in possession of the original Raw image.
  • You will need to specifically say that you have contacted the web site and they have refused to remove the image.

Send the DMCA complaint to the Web hosting Company.

After you lodge the DMCA complaint what will happen.  In the above case the Web sites with the offending image have been blocked by the Hosting Company, a successful end of story from my perspective.

Thanks to Luke (my son), a web software developer, who helped me resolve this issue.

Organising a Photographic Web Site

Tawny Frogmouth

 The image above is of a Tawney Frogmouth, scanned from a film image.

I have had several queries about my web site design, how it is constructed and arranged.

The Blogging and Gallery software is quite simple to implement and use, being standard WordPress software. There are many options available with WordPress to select alternative themes to differentiate the look of your web site from other sites.

Basically there are four main parts of the content sections of WordPress as follows:

  1. Posts – This is the section where the readers see the regular blogs in chronological order.
  2. Pages – This section is where other miscellaneous pages are placed, which do not appear in the post blog section but are general information pages such as the About page. I also place the Galleries in the Pages section. Each Gallery index page is simply a table of four colums with the thumb nail images inserted in each cell with links to the individual Galleries.
  3. Media Library- The media area is the WordPress area where all the images are hosted. They are not hosted on a seperate site but with the rest of the WordPress content. If required the images can be hosted on a seperate site.
  4. Galleries – The formation of the Galleries are a standard WordPress feature in the current versions of WordPress. When forming a Page the images are uploaded and there is an option after uploading the images to form the images  into Galleries with various column widths. Also captions and image titles can be added. There are available various plug-in options with WordPress to enhance the galleries, however I find the standard WordPress options with the slide shows to be quite satisfactory. Also the images in each individual post can be viewed as a gallery.

Having a Blog is a great mechanism to communicate with the general public and with other photographers which I find quite refreshing and a great means of getting new ideas.

Post Processing for Quality Images

In order to produce the highest quality images it is essential to establish a professional workflow through the complete imaging process from download, through organisation, editing, manipulation and saving the files.

Downloading

Some downloading software now provides image editing functions through the downloading process, however this is generally less than the best optimised results possible. It is not the best idea to provide image enhancement operations during the download process if quality results are desired.

Organization

This has been discussed in our article on organising images. It is recommended that the different versions of the image be saved at various times during the post processing stages.

Archive

It is important that the original raw file be archived. This non manipulated file is the original and you may need to return to it at some future point in time.

Working File Format

When converting the original raw file to a working file it is critical to ensure that you do not loose quality through this process. It is essentiol to convert to a non lossy format such as PSD (Photoshop document ) of TIFF format. This is the only way to stop the ongoing destructive process of information within the file. If the file is converted to a JPEG format, each time the file is saved there will be some loss of detail.

Raw Conversion

If processing the raw files with Photoshop, it is best to make the initial changes through Adobe Camera Raw and then work on the files in 16 bit per channel mode as this will be less destructive to the image.

Edit your images in high bit mode as long as possible to avoid any destructive process to the image. Always use non destructive editing options such as using adjustment layers when you can.

After making all changes to the image in 16 bit per channel non destructive mode, save the image as a base image.

Processing

To make specific changes to the image to suit the output cvonvert to 8 bit per channel mode and proceed to make the changes. These will be changes such as color, brightness, contrast and sharpness changes.

When saving this file ensure that you do not save it over any previously saved file.

Automating Your Photographic Workflow

Automating your workflow can save many hours in processing your image files. Essentially Photoshop provides three methods of automation to process your image files. The first two methods, Actions and Batch Processing are quite easy to learn, however the third, Scripts is far more complex and requires programming knowledge.

Actions

The actions feature in Photoshop allows you to record each step as you perform actions. Each action recorded can be replayed on a different image.

If you can not see the action palette, click on Windows > Actions and it will appear. To commence a new action, click on the area at the top right of the Actions palette. A popup menu will be displayed, select New Action, enter your name for the action and your keyboard combination for playing it. Select the color to be displayed for this action and press the record button. Now perform all the steps required on the image and when completed hit the Stop button.

To apply a saved action to a new image, open the image file select the play button at the bottom of the Actions palette.

Batch Processing

The batch processing in Photoshop is basically an extension of the Actionsprocess. Once an action has been recorded it allowsyou to apply the action automaticallt to all the images in a folder

The batch processing pacility can be accessed from the File menu, File > Automate > Batch where you choose the action to be applied and the Source and Destination of the files to be processed.

Scripts

If you want even more automation than batch processing then you can write scripts in programming languages. Scripts are a series of commands that tell Photoshop how to process the image in code language. Scripts are pieces of code and are far more comlpex than batch processing however they offer much more flexibility for the programming literate users.

Certain sripts are available on the internet for use if required to provide various actions.

Protecting Your Images

Your hard drive has crashed, are your images safe, well I hope so, if you have backed them up. Keeping up to date duplicates of all your important pictures is one of the smartest things you can do.

Keeping all your files organised is one of the first steps to successfully backing up all your images. Keep the one location on your computer where all the files are organised.

These days it is so easy to provide a reliable back up solution and it is so cheap.

CD and DVD Discs

It is so easy to create multi disc archives that can store gigabytes of information. Multiple DVD’s can store huge amounts of data.

External Hard Drives

External hard drives now are very cheap and they come in very large sizes, even up to 1TByte.

Use a Dedicated Backup Utility

A dedicated backup utility will assist greatly and make it much easier to backup your data on a regular basis. You will need to consider the cost of the backup solution and also if it fits in with the way you work.

Backup Regularly

There is no point in having a quality backup solution if you do not implement it on a regular basis, even if it is as frequently as daily.

Store the Duplicates Securely

Think about all the eventualities that can occur and consider them all in safe and secure storage of your backups. The following things will need to be considered:

  • Hard drive crashes
  • Electrical surges
  • Burglary
  • Fire
  • Floods

Also consider off site storage if that is warranted to counter some of the above considerations.

Organising Your Images

With the use of digital cameras we are now taking many more images than we were many years ago. What happens when you want to track down one of the many thousands of images you have taken. Will you be able to retreive the image you need.

In the Camera

The first step in keeping you images in order is setting your camera to the correct numbering sequence. Most cameras will have options to allow you to number the images in a complete sequence where no two images will have the same number, or another option will be where the camera resets the number sequence every time the flash card is relplaced in the camera. To ensure that no two files have the same numbering ensure that files are numbered in a continuous sequence.

Also ensure that the date inclusions are switched on to ensure all files are dated.

Computer File Structures

Ensure that you have a satisfactory file and folder structure on your computer to organise your files. One that I find suitable is as follows:

File Structure

With the above structure you will have seperate folders for each year and under each year there will be many subject, location or client headings.

If you take raw images and also use .jpg images, store the different format images in seperate folders. With raw images, always keep the original raw file so that you can go back if required and rework the original raw file. I find that my post processing skills improve with time and I can always go back and produce a better post processed file from the original raw file. Your raw images are the equivalent of negatives in the days of film, without the negative the quality images can never be reproduced, similarly with digital, without the raw images the original can never ber reproduced. So keep the raw files an a seperate folder and protect them from loss.

Ensure that your computer provides thumbnail previews for each image.

Image editing software will provide facilities to add key words to each image.

Key Word Strategies

The best way to categorize and keyword your images will depend on the type of photos you take and the way that you work but there ar some proven methoda that you can use.

  • Photos will be broken down into subjects and sub-subjects which may be places visited, family, friends, names etc.
  • Photos can be broken down into timelines such as capture date
  • You mat want to break the keyword down into file types
  • You may want to be project based such as breaking keywords down into categories such as landscapes, people, nature, animals or birds etc.
  • You can break down categories into clients or particular jobs.

A good organisational approach to organising your workflow will assist greatly in allowing you to find images long after you have taken them.

Computer Backups

It can not be stressed enough, that a thorough and organised back up strategy for your images is critical to preserve you images for future generations.