Archive for the ‘Panorama Photography’ Category

What is the Best Nikon Landscape Lens?

Glasshouse Mountains Tone mapped

These images of the Glasshouse Mountains, have been photographed with a Nikon D2H camera and a wide angle zoom lens.

The above image has been tone mapped using Photomatix software, this software is very good for bringing out detail and texture in the image, it also improves the range of tones by using HDR (High Dynamis Range) techniques. In the above image it has really brought out the detail in the clouds and also in the foreground scenery.

Glasshouse Mountains Panorama

The above panorama image is a stitched image to take in the extreme wide vista of this scene.

In all the images here a Nikon DX camera has been used and a zoom lens at 20mm. With a DX camera a lens in the range is the Nikon 10-24mm lens which is very nice for capturing wide vistas, another excellent lens is the Nikon 17-55mm f/2 lens which covers a longer range.

Glasshouse Mountains

If using a FX camera with the full frame sensor then the ultimate lens is the Nikon 14-24mm f/2.0 wide zoom, this lens has superb performance for landscapes, 14mm is extremely wide on an FX sensor.

Irrespective of the lens used for landscapes like this, it is best to use a good tripod to get the sharpest images.

Night Photography with a Digital Camera

Surfers Paradise from Currumbin

Surfers Paradise from Currumbin

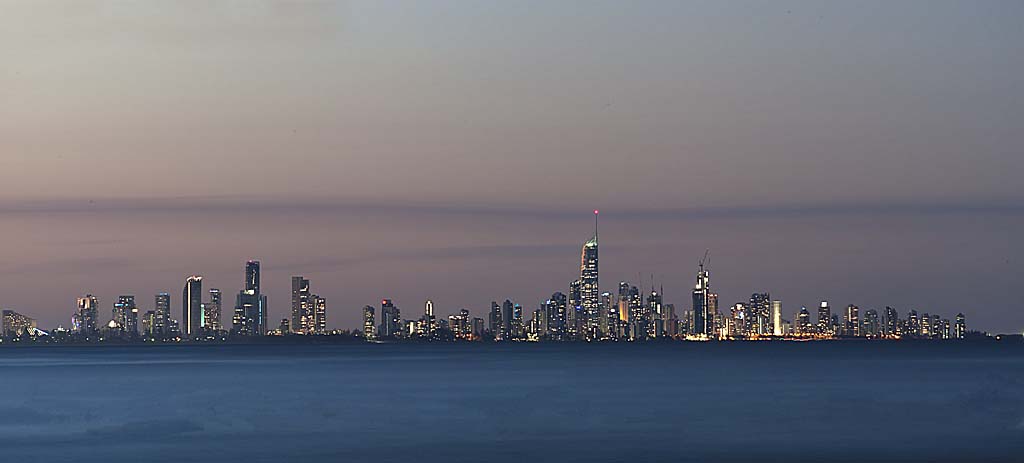
The above image has been captured from the Currumbin beach, looking towards Surfers Paradise, I took this image at the following camera settings:

  • Aperture, f/16,
  • Shutter speed, 30 seconds,
  • 300mm lens,
  • 100 ISO.

The images is a panorama of two images stitched together in Photoshop and it was quite dark when the image was captured. The reason I took the image at such a low shutter speed of 30 seconds, was to create a blurred effect over the water and in the clouds. The camera used was a Nikon D700. The image was taken after dark using a tripod and a remote cable release.

Even during daytime similar images can be captured, using a neutral density filter, so that the shutter speeds can be greatly reduced.

Night time is a great time to catch a panorama image. At this time the lighting is very subdued and even.

Always be prepared to get your camera out at night, with the capabilities of today’s cameras with high ISO, great night images can easily be captured.

The lighting just after dusk is generally excellent for exceptional lighting and sharp images can be obtained by using a tripod and cable release. A tripod was essential for the above image as the exposure was 30 seconds with a long 300mm lens.

Panorama of Hawk At Sunset

Hawk At Sunset

This panorama of the sky with the hawk, has been captured from my back yard at sunset, so this proves that you do not have to go very far to get some very nice images. The panorama was stitched in the PTGui software. I find this software excellent for panormas as it blends the images together perfectly even when the two stitched images have slightly different exposures.

Normally when I am taking panoramas, I would use manual exposure mode, to ensure that all of the exposures are the same, but in the case of this image the camera was set to automatic, aperture priority mode and I did not have time to change it to manual mode, otherwise I would have completely missed the shot.

For more bird images please visit my Bird Gallery.

Capturing the Wide Expanses of the Outback

Blue Sunset, Lake Argyle

The above image has been captured at Lake Argyle in the Kimberlies, Western Australia. It is a composite image stitched together in PTGui software with post processing in Photoshop. Lake Argyle is situated near Kununurra on the western side of the Kimberly Ranges. There are beautiful sunset cruises on Lake Argyle to give the best views of this area.

Lake Argyle is Australias second largest artificially made lake by volume and forms an important part of the wetlands in the area of the east Kimberlies. The lake is on the Ord river and forms the basis of a major irrigation system for the surrounding area. There is also abundant wildlife around the lake with one of the major attractions being the freshwater crocodiles.

Capturing the wide expanses of the country is all about getting to use wide angle lenses and also widening your perspective by stitching panorama images together.

See more images from Lake Argyle in the Lake Argyle Gallery.

Panorama Photography in a Beautiful Cave

The Natural Bridge, Cave Creek, Springbrook National Park

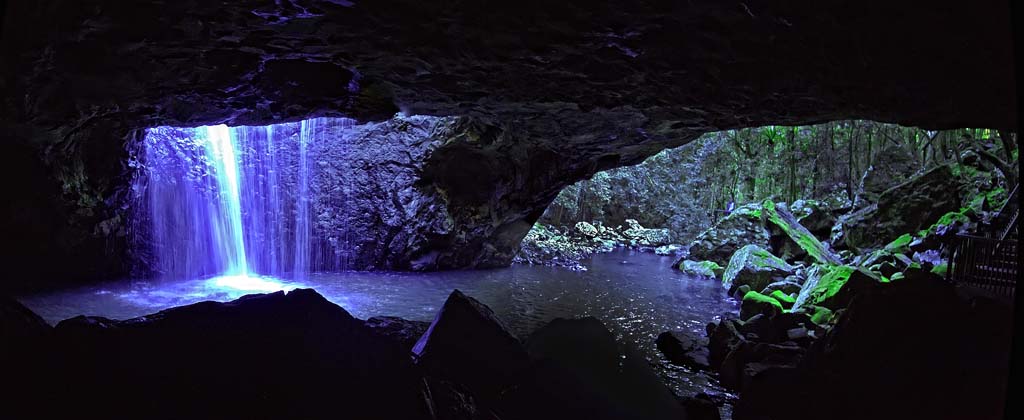
 The above image was taken at the Natural Bridge in the Springbrook National Park,Queensland, Australia. The image is a composte of two images stitched together to form a panorama.

This image was captured in a cave, nearly in complete darkness, I required a light to see the settings on the camera.

A tripod was used due to the longish exposure required of 1/8 second, at an aperture of f/9, with an ISO setting of 3200. The camera was swivelled on the tripod to get the two exposures, as I wished to capture the waterfall and the entrance to the cave in the one exposure.

This image required quite a bit of work in Photoshop to bring out the detail in the shadows and also in the highlights.

Constructing a Panorama Image

Image 1

Image 2


 Panorama photography enables photographers to effectively take larger format images without the expense of larger format equipment.

This tutorial covers the making of a panorama with Photoshop CS3 using layers. The two original images used to form the panorama are shown above. These two images are opened in Photoshop and the two images are merged together in layers to form one image. Both images were taken in Raw format  and converted in Photoshop. Any vignetting of the images is corrected prior to combining the layers. The two images can be combined by copying and pasting one on to the other resulting in the following layers.

Layers 1

Double click on the locked background layer shown above and then select OK in the New Layer option. The Layers will then be shown as follows.

Layers 2

 The layers are then manually but roughly aligned. Both layers are then selected and they are accurately aligned using Photoshop, Edit/Auto-Align Layers. Click OK to align the images.

Once the above has been completed select Image/Reveal All to to fit the image to the canvas area,

 The next step is to blend the images using Edit/Blend Layers to make the image such that the joins in the layers can not be seen.

Next crop the image – Image/Crop, then Layer/Merge Layers to bring it back to a single layer and then touch the image up in Photoshop to your satisfaction. The resulting image is as follows.

Cockburn Ranges Panorama