Modern cameras offer many options when it comes to choosing the focus modes on your camera. In this article we will discuss some of the options generally available in todays cameras.
Category: Camera Settings For Better Images
Camera Shooting Modes
Many cameras will offer a range of shooting modes to select from as follows. Single Frame Mode, Continuous Low Speed Mode, Continuous high speed mode, Self Timer Mode, Mirror Up Mode, Live View Mode.
Camera Light Metering Mode Settings For Quality Images
Generally with modern cameras several exposure metering modes are available to select from. The metering is initiated by the half press of the shutter realease button. Metering Modes In most cameras the following modes may be available. Color Matrix Metering In this mode metering can be performed by a sensor with up to 1,000 pixels… Continue reading Camera Light Metering Mode Settings For Quality Images
Digital Photography
Digital photography is unlimited. With film we were limited by the chemical processes which were used. Now we use many different software packages to process our digital files and we are virtually unlimited in what we can do in Photoshop and other software packages.
With digital we now have many variables, shutter speed, aperture, ISO, white balance, sharpness, contrast, saturation and custom curves for some of the more sophisticated cameras.
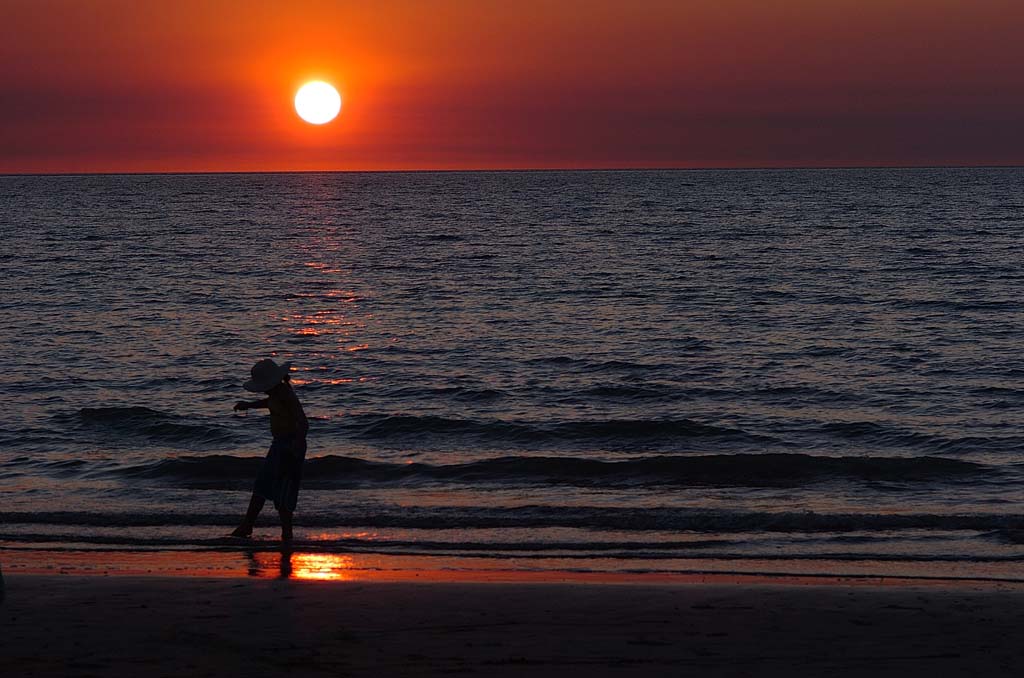
Focussing and Depth of Field
Accurate focusing is one of the two main steps in obtaining an excellent image, the other main step is setting the camera to the correct exposure. If the scene captured by the camera contains close objects near the camera and far objects at a distance from the camera it may be difficult to get all of the image in focus due to depth of field limitations. The depth of field is a zone of focus in front of the subject and behind the subject which is acceptably sharp. This zone is controlled by the aperture setting of the lens.
Digital Single Lens Reflex (DSLR) Camera Selection
Here we outline the main aspects to consider in selecting and purchasing a Digital Single Lens Reflex (DSLR) camera, to help you make an informed decision on your camera purchase. The range of cameras available in any particular country may vary at any time but we endevour to give you some guidance an what to look for. DSLR cameras have larger image sensors than the compact range of cameras and will offer a far greater image quality. In addition, the range of DSLR cameras will offer a far better high ISO performance (to perform better in low light conditions) than the compact cameras.
Camera Settings For Quality Images
Modern digital cameras will present many option which will have a bearing on the final quality of the images and it can be very confusing to get the best quality out of the camera. Choosing Raw will give the best capture in respect to tone and color. TIFF is the next best option as with both these options there is no loss quality. Some cameras will give a choice of shooting in modes of 16, 12 or 8 bits per channel, which will influence the color depth of the image. Choosing the higher bit depth will give larger files but will also give higher quality images.
Shutter Speed
The shutter speed of the camera indicates how long the shutter remains open to let the light to the film or the digital sensor.
Slower shutter speeds will give a more blurred image and faster shutter speeds will help eliminate camera shake. A good rule to reduce camera shake is to use a shutter speed faster than the focal length of the lens in use. For example with a 100mm lens use a shutter speed of 1/100 of a second or shorter.
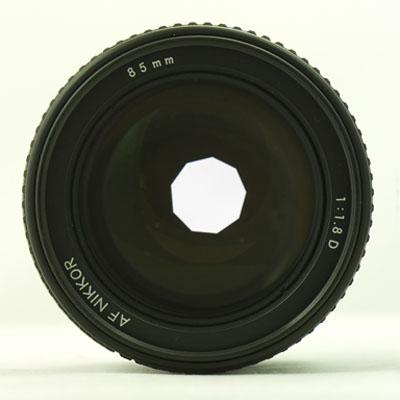
Lens Aperture
The aperture of the lens refers to the size of the opening inside the lens where the light passes through to reach the film or or the digital sensor. The f-stop number represent the ratio of the focal length of the lens to the diameter of the lens diaphragm opening of the lens. The f-stop number will control the depth of field of the image.